Sunday, August 19, 2007
Back pick

The back is finally on #2. I trimmed it down as close as I can without hand tools (needed around the neck joint), and will be binding the back soon.
Monday, May 28, 2007
#2 top attached to neck

Finished fitting the neck today, and glued it to the back. Next is attaching the back, cutting it to shape, and routing it for binding.
#3 done
 Turned out nice. Looks good and sounds great.
Saturday, February 24, 2007
Sunburst done, ready for finish
Friday, February 23, 2007
Ok, so I couldn't wait...

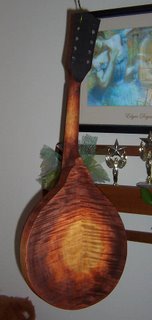
I couldn't resist mixing up a base coat and applying it tonight. Instead of a yellow base like I did on my first one, I decided to go with plain amber, which is one of my analine dye base colors. I am very pleased with how nice looking this color turned out on the mando. No doubt I'm doing my personal F style (#4 mando) with this base color when I get to that point. Enjoy the pic.
P.S. - don't mind the kid's poster and the toy in the pic here. The only spare hook I could find to hang the mando from to dry is in my little girl's room, lol. She won't mind, she's not home this weekend anyway :-)
Back to work


I'm glad to be back building after a long layoff. I spent from the time I got home from work until a few minutes ago (around midnight) working on #3. I removed all the strings and hardware, and got it ready to start staining. That involved several hours of sanding, wiping down with a damp cloth to check, and then more sanding. I stopped at 600 grit sandpaper. I then masked the fretboard to keep from getting stain on it. I decided to try masking the body binding, and it went really well. The common technique is to just stain over the binding, and spend many many hours scraping the stain off the binding when it dries. I spent probably 10 hours just scraping binding on my first mandolin. Even though there will still be some scraping, I was able to cover 90% of it with masking tape, so I know that will save me time. Tomorrow I will mix up the base coat and stain the entire instrument. I want to get a prettier amber than I did with my first mandolin, it was a little too yellow for me. Enough for tonight. Here's a pic of the fretboard masked, and the body binding masked.
Thursday, September 14, 2006
JD- send me an email
As you might know by now, I'm no longer at BD. Send me an email from your personal email account to hydrilla at hotmail dot com (typed it that way to prevent spam). Thanks man.
Sunday, September 10, 2006
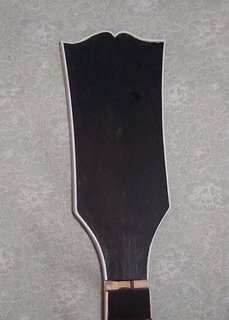
Headstock binding done on #2

I routed the headstock binding channel today, and bent/glued in/scraped down the binding. What a big difference from my first attempt at headstock binding- this one looks a thousand percent better. I'm pretty much done cutting out the inlay, so in the next couple of days, I'l be routing for the inlay, and going ahead with setting/gluing the inlay in.
Saturday, July 29, 2006
#3 Strung up "in the white"

 I just strung this one up and she sounds great. Better than my first one I built, I think. VERY LOUD, and maybe a little better bass, with balanced ringing highs. It's strung up with a rosewood bridge and plastic nut, so it sounds a little tinny like my first one did, but that will go away when I set up the bone nut and ebony bridge. I decided to not bind the headstock or the back, I think it looks great without. I'm happy with this headstock shape. The action is a good bit too low right now which is fine, since the bridge is set pretty low. I think the ideal action will be with the bridge set about 40% from all the way up, which is pretty danged good. Now I'll need to carve the bone nut, set up the bridge, and get #2 caught up to this one.
